
Developmental Writing Deep Dive Part 1: Pencil Grip
As an early childhood educator, I am responsible for a lot of firsts. One of the firsts I love teaching the MOST is writing. It is such a magical journey that opens up a whole world for children to explore. But writing doesn’t just happen. There are many steps that must be taught explicitly, in a developmentally sequenced order, with research-backed and child-centered strategies in order to help a child become a fluent writer. And lucky for you, I have spent the past decade teaching and testing these strategies in the classroom and I am going to walk you through it, step-by-step. In Part 1 of this 3-part series, I will be walking you through the prerequisite skills that must be developed before any writing can begin. Let’s dive in!
(Links that appear in this blog may be affiliate links and earn me a small commission when you shop through them at no additional expense to you.)
Step 1: Fine Motor Development
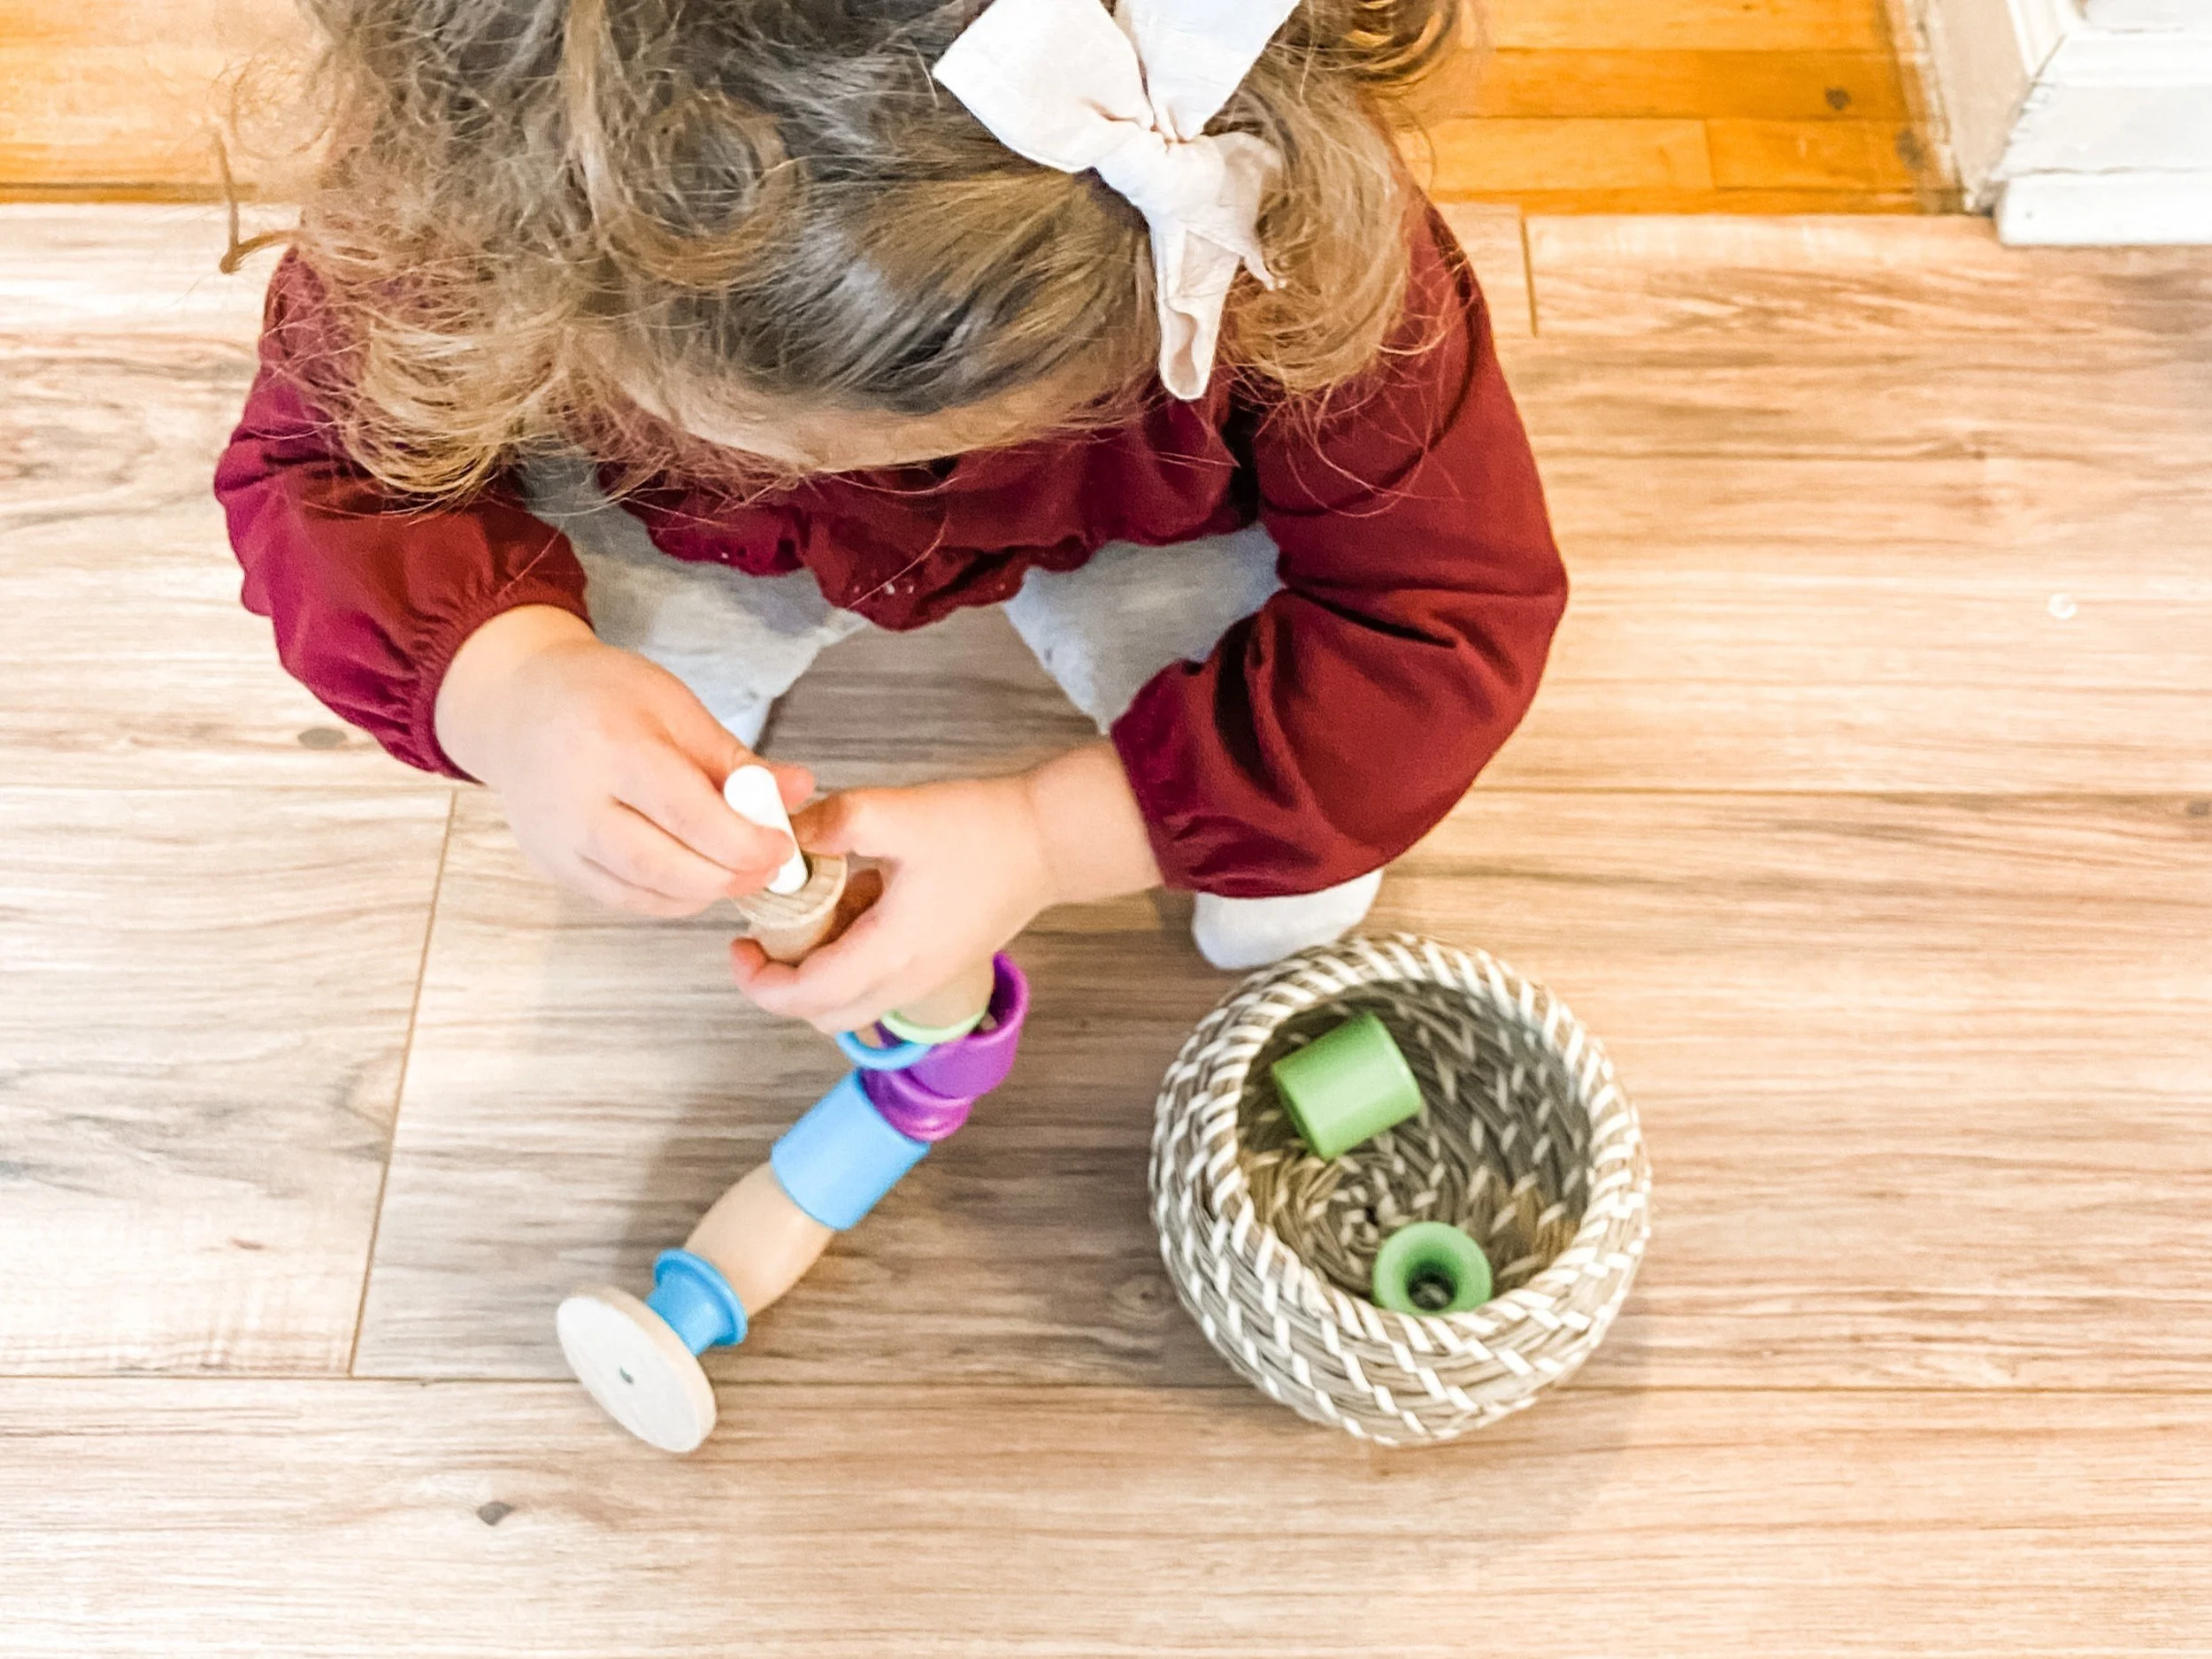
Before a child is ever handed a writing utensil and expected to make marks with it, we must first focus on building their fine motor skills. Fine motor skills are the building blocks of the hand and wrist muscles that are needed prior to using the same muscles for any type of drawing or writing. Motions such as pinching, pulling, squeezing, poking, threading, posting, lacing, etc. are all skills that we must practice before the pencil holding begins. Here are a few of my favorite fine motor activities that yield the highest rewards:
Dough Play: Playing with play dough is such a high yield fine motor activity! Pinching, squeezing, pulling, rolling, poking, it’s all a part of play dough play! This is such a fantastic way to build the muscles needed to hold a pencil, and is a great sensory regulating activity as well. Here’s the set we use!
Lacing: This is an excellent activity that requires bilateral coordination (both hands working together at the same time) and requires the “pincer grasp” where the thumb, pointer, and middle fingers must all come together to pinch and manipulate the materials. The precision needed to lace a string through a bead helps refine the hand movements that will later be used to write letters. This is a great lacing set.
Stickers: Again, this activity requires the same pincer grasp as lacing, and what kid doesn’t love a good sticker? (Okay maybe some, but most children would love to peel and stick to their heart’s content!) You can set up sticker matching, color sorting, card decorating, and more. In the beginning, you may need to remove the sticker backing to make it easier for the child to just peel off the sticker, and as their skills grow they won’t need that scaffold any longer. Check out our go-to sticker books!

Tweezers: Transferring and sorting using kid sized tweezers is an immediate precursor to pencil holding as it requires a very similar hand placement of the thumb being on one side and the pointer and middle finger working together on the other. Tweezers are a complex skill that will take ample time and repeated exposures, but once the child grasps this concept, adding tweezers to your activities is a great way to sneak in fine motor work with academic focused work! Here is a post that shows some different ways we incorporate tweezers!
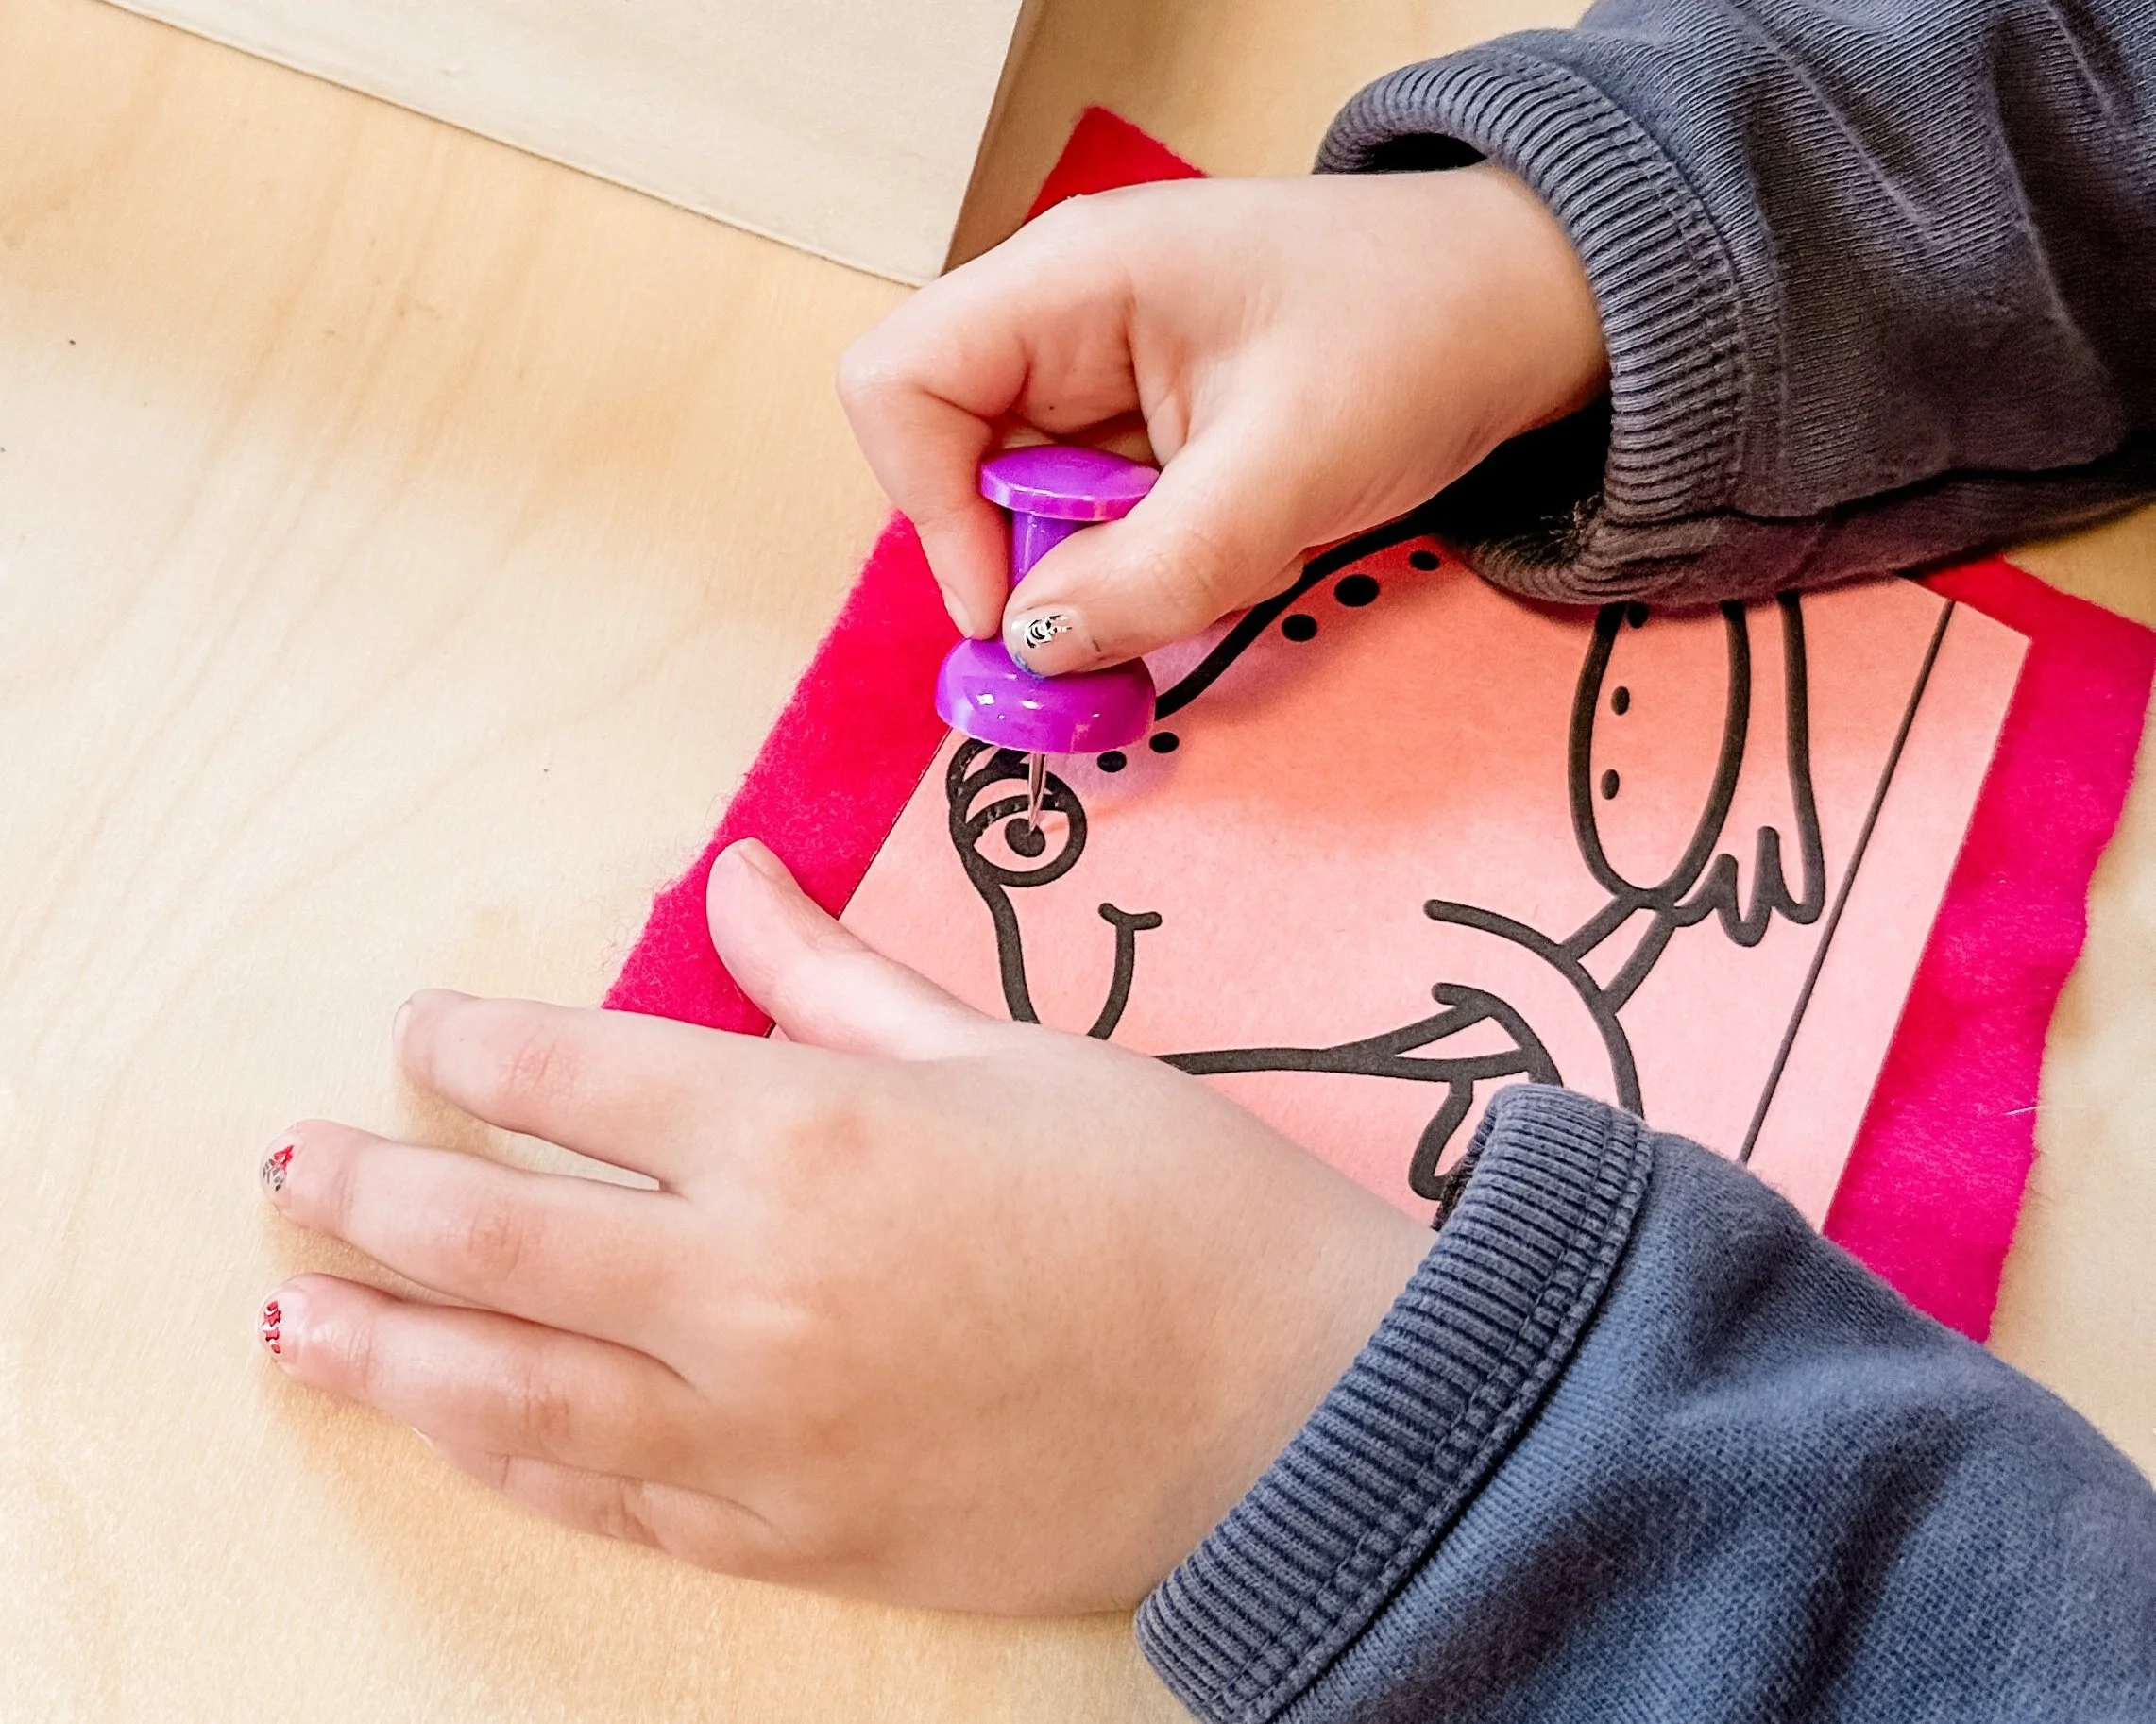
Pin Punching: This activity requires a jumbo push pin, small piece of felt, and a pin punching template. The goal is for children to poke holes close together along the black line to eventually be able to punch out the picture from the paper. The jumbo push pin mimics a quadrupod and tripod pencil grip and allows children to refine that grasp and get used to making tiny small movements from their wrists and fingers just like they will with a pencil.
Step 2: Writing Utensil Exposure
When your child has been working hard and developing their fine motor skills and muscle strength, they may be ready to start making marks with a variety of writing utensils. Pencils and pens may be an end goal when they begin word and sentence writing, but long before that there are other great tools that will allow them to find their grip in a developmentally sequenced way that are the perfect size for their growing fingers. Here are some of the writing utensils I make available to my learners alongside pencils.
Egg Crayons: This is a great first crayon for small children as they allow them to grab the crayon with their entire hand. I introduced this style of crayon around 10-12 months, as a pincer grasp is not appropriate at that age. This allows for the child to make marks using their entire arm, which is their level of specificity with mark making at this age/stage. Grab a set of egg crayons here.
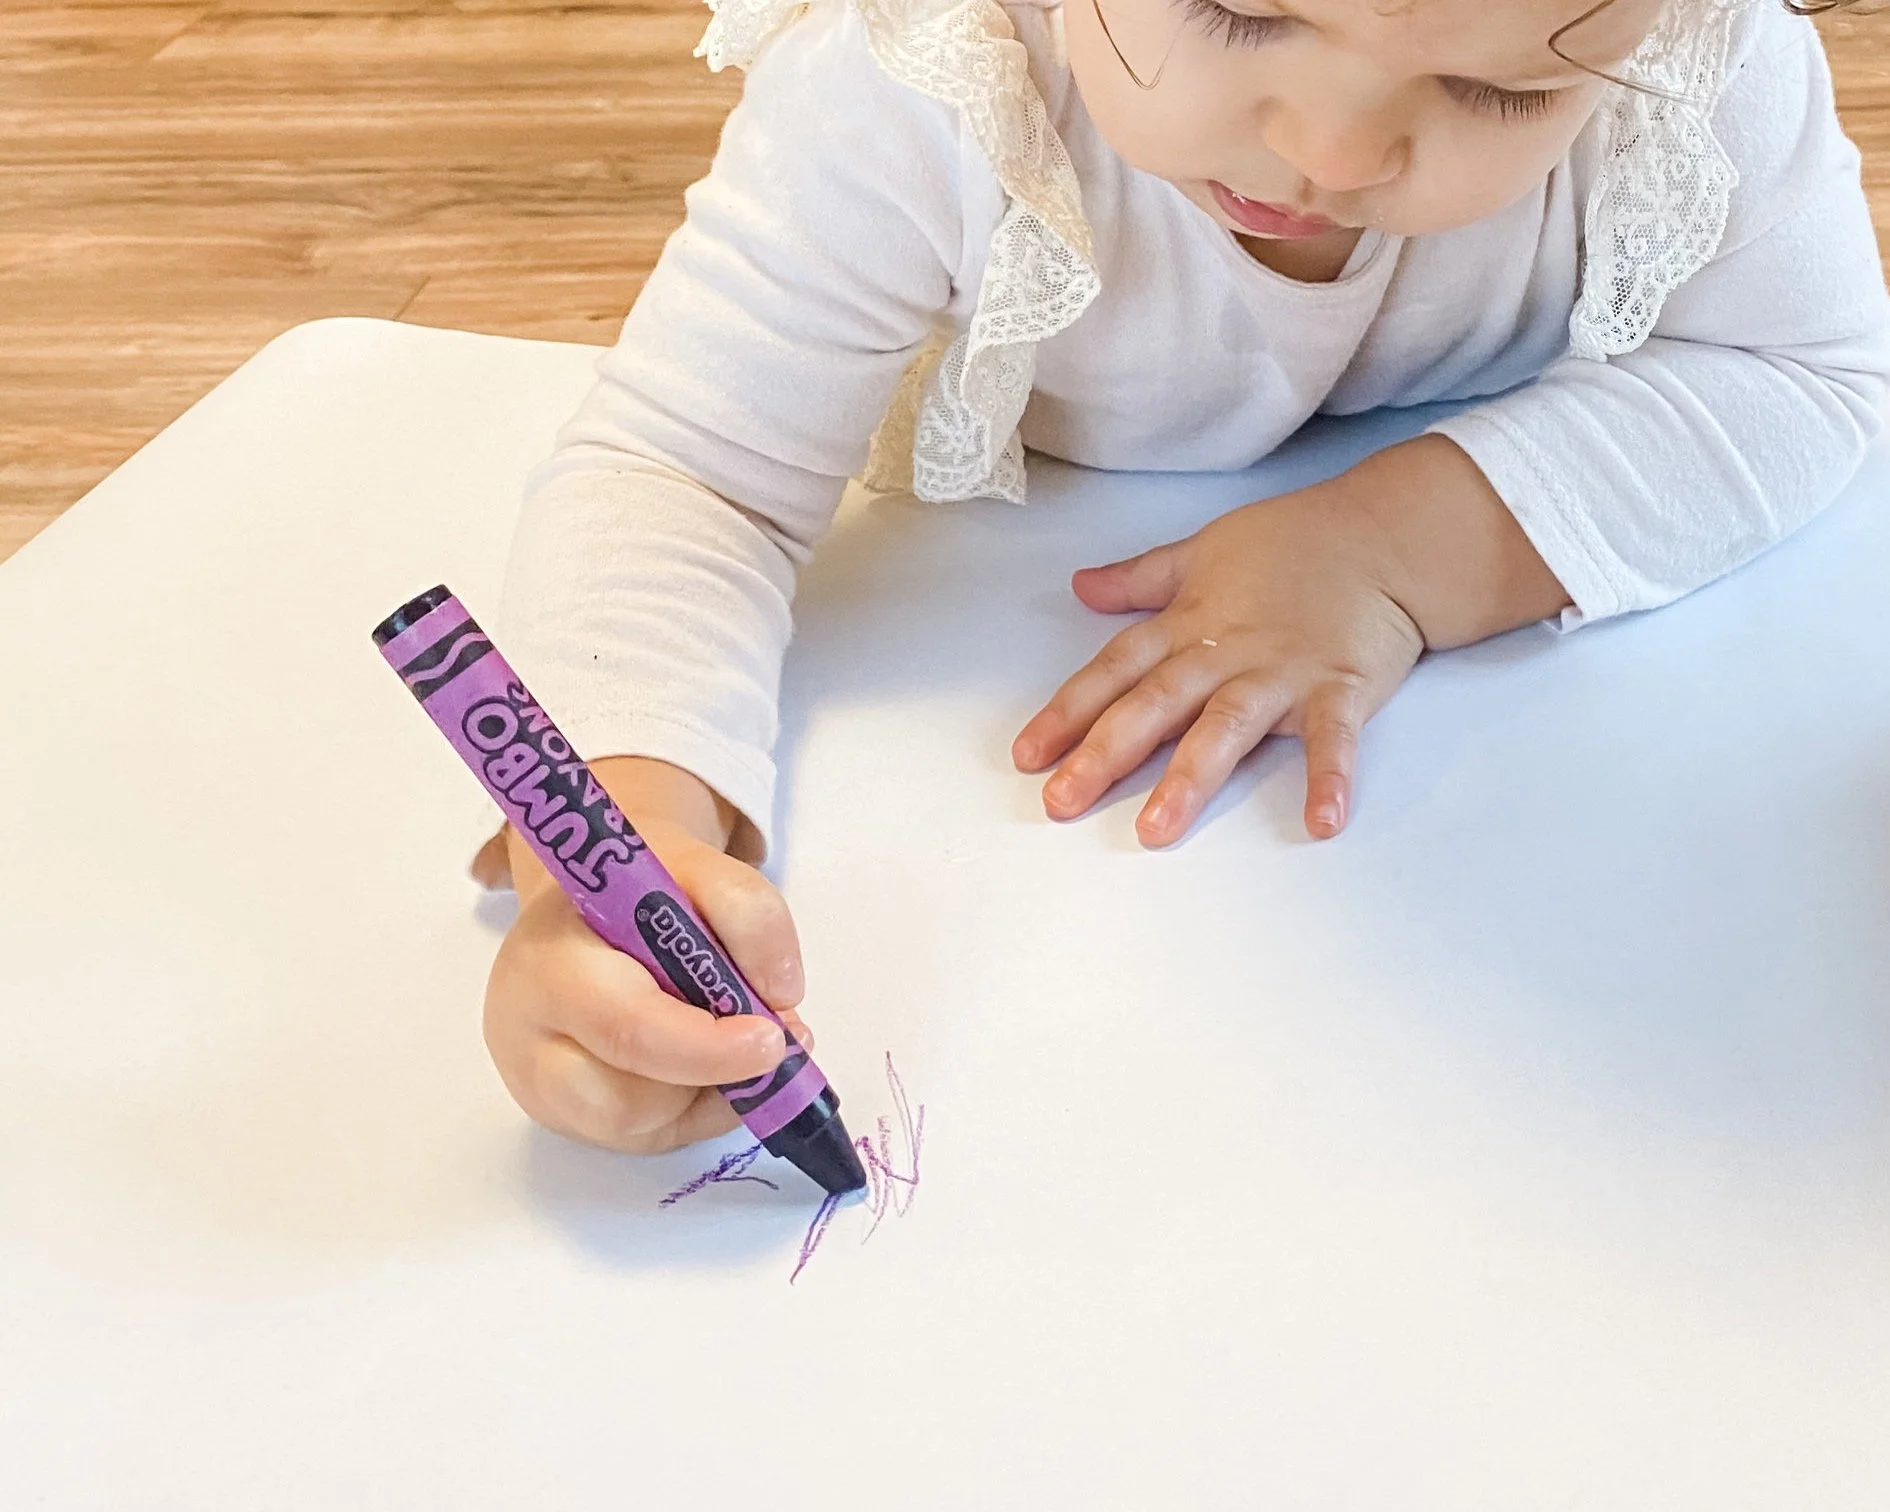
Jumbo Crayons: Because of the size of these crayons, children are able to grip them again with their entire fist. They may still mark using their entire arm, or they might begin to refine it more by moving from the elbow down. Even as kids develop their more traditional grip, these are my go to crayons for small hands. Here’s my favorite set of jumbo crayons.
Broken Chalk, Rock Crayons, Broken Crayons: Each of these writing materials has the same feature - they are small and they force the hand to pinch with fingers rather than grab with their full fist. These options are great for 3+, and I like to make these available for coloring, matching activities where lines have to be drawn, or even beginning Developmental Writing Pathways work.
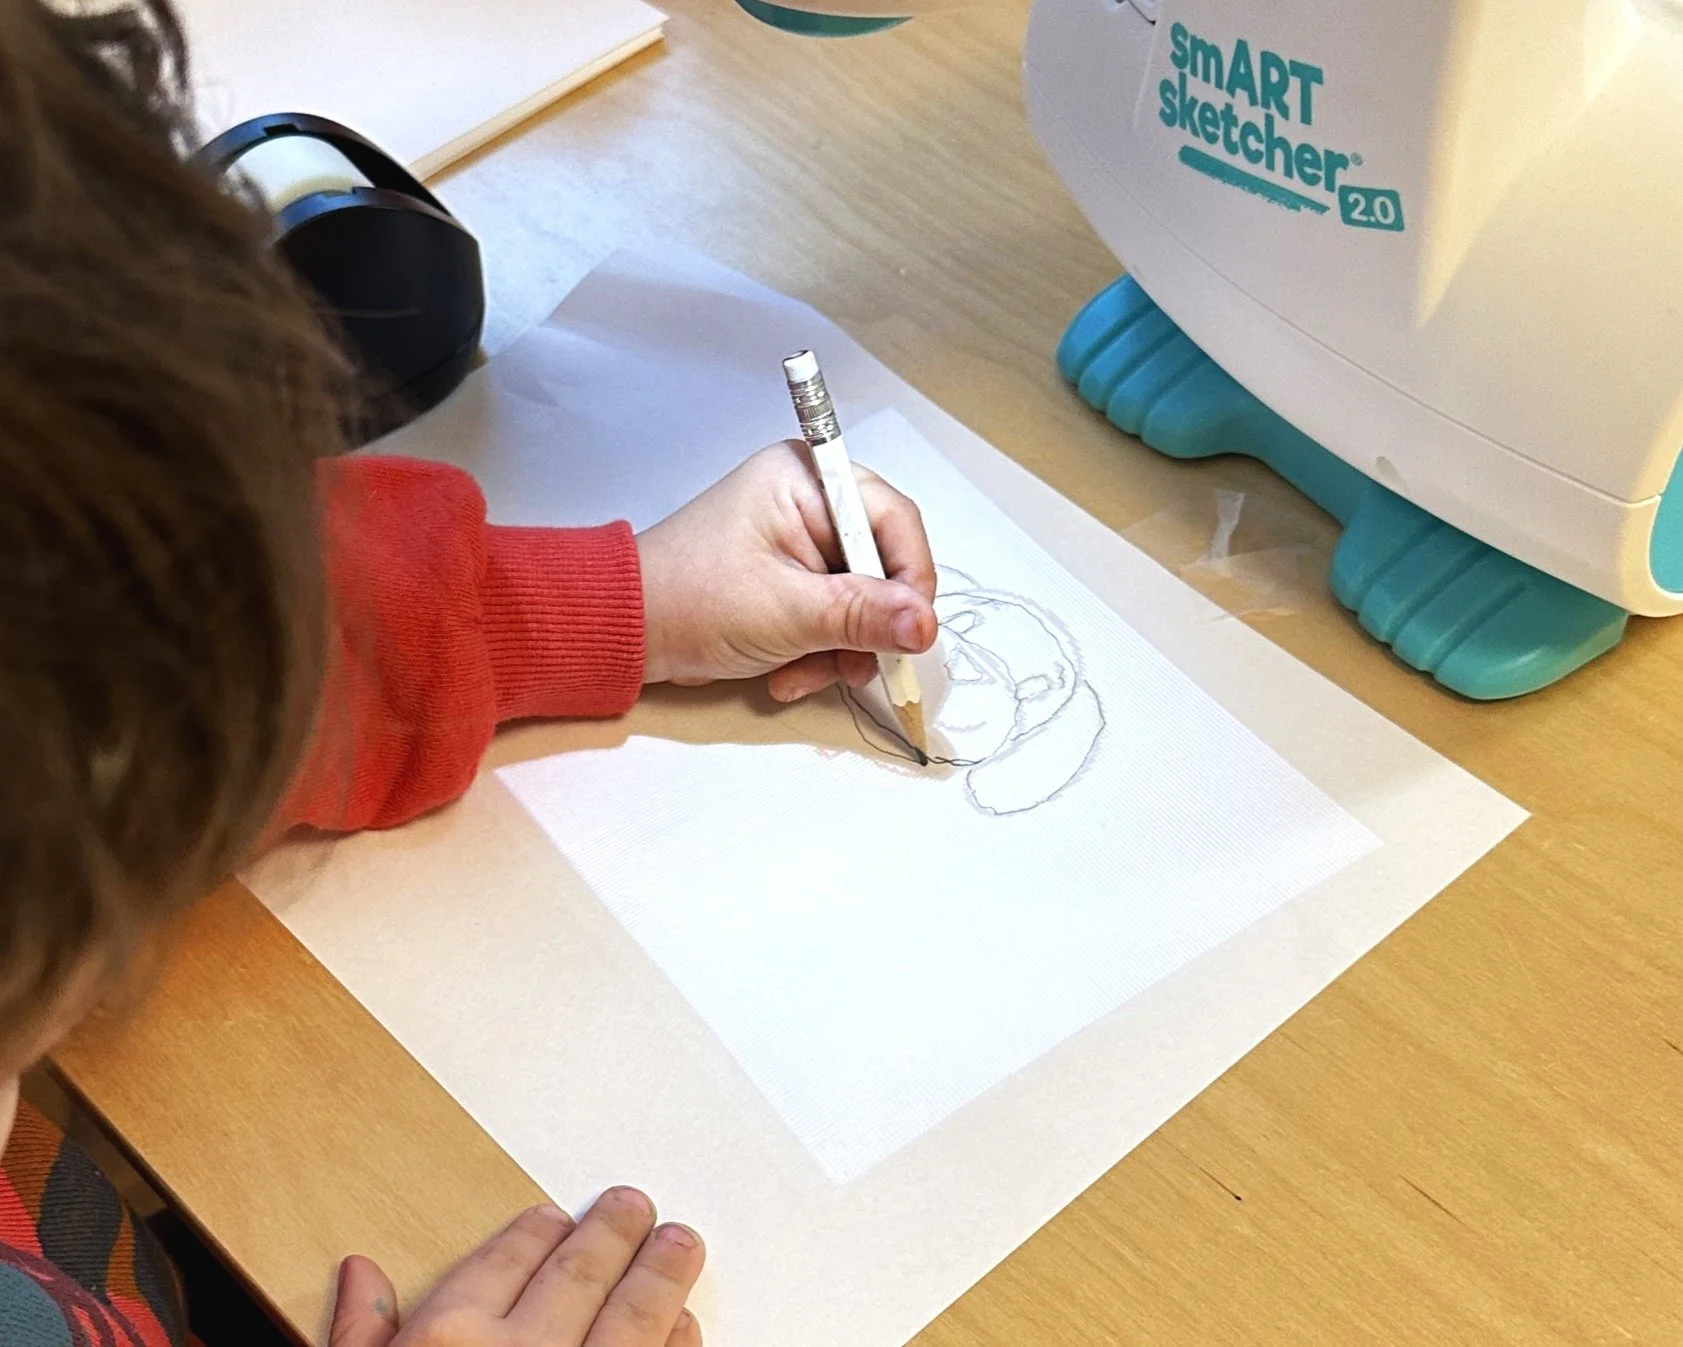
Golf-sized Pencils: Once a child has had ample repeated exposure to these other writing utensils and is naturally picking up writing utensils, paint brushes, crayons, etc. using a more traditional grip, then I will provide a beginner pencil such as a triangular pencil or a golf pencil. Small pencils like these are going to help a child maneuver this traditional writing utensil with more ease because they are smaller in length, but larger in circumference which makes it easier for their hands to hold.
Step 3: Understanding Pencil Grip Development
As a kindergarten, and now preschool teacher, I have seen a wide variety of pencil grips come through my classrooms. Many fall along the developmental spectrum of pencil grip, and some are learned grips that a child has created themselves out of necessity due to being given a writing utensil too soon and being expected to write with it before they are ready. Just like riding a bike, learning to read, potty training, and other milestone achievements, pencil grip has a sequence of steps that a child will work through, at their own pace, and with encouragement, exposure, and time, will reach the end goal. There are 5 common pencil grips that children will move through on their way to one of the two most common traditional grips. The pencil grips you see below your child will move through in their own time. Some may be skipped, and sometimes when you think they have moved past one they will return back to it, but do not fret, this is common and expected. The most important thing you can do for your child as they work through these grips over the years (yes, years), is give them time. Time to explore, time to try new writing utensils, time to feel confident and then try something new. Rushing or forcing a grip is going to result in the non traditional grips that I described previously, and these hinder a child’s writing fluency. It is also important to note that a child will switch hands when developing their pencil grip. Hand dominance is typically established from 3-6 years old, a wide spread of years, so allow your child to explore using both hands as they will also settle into their dominant hand in their own time.
Let’s explore pencil grips:
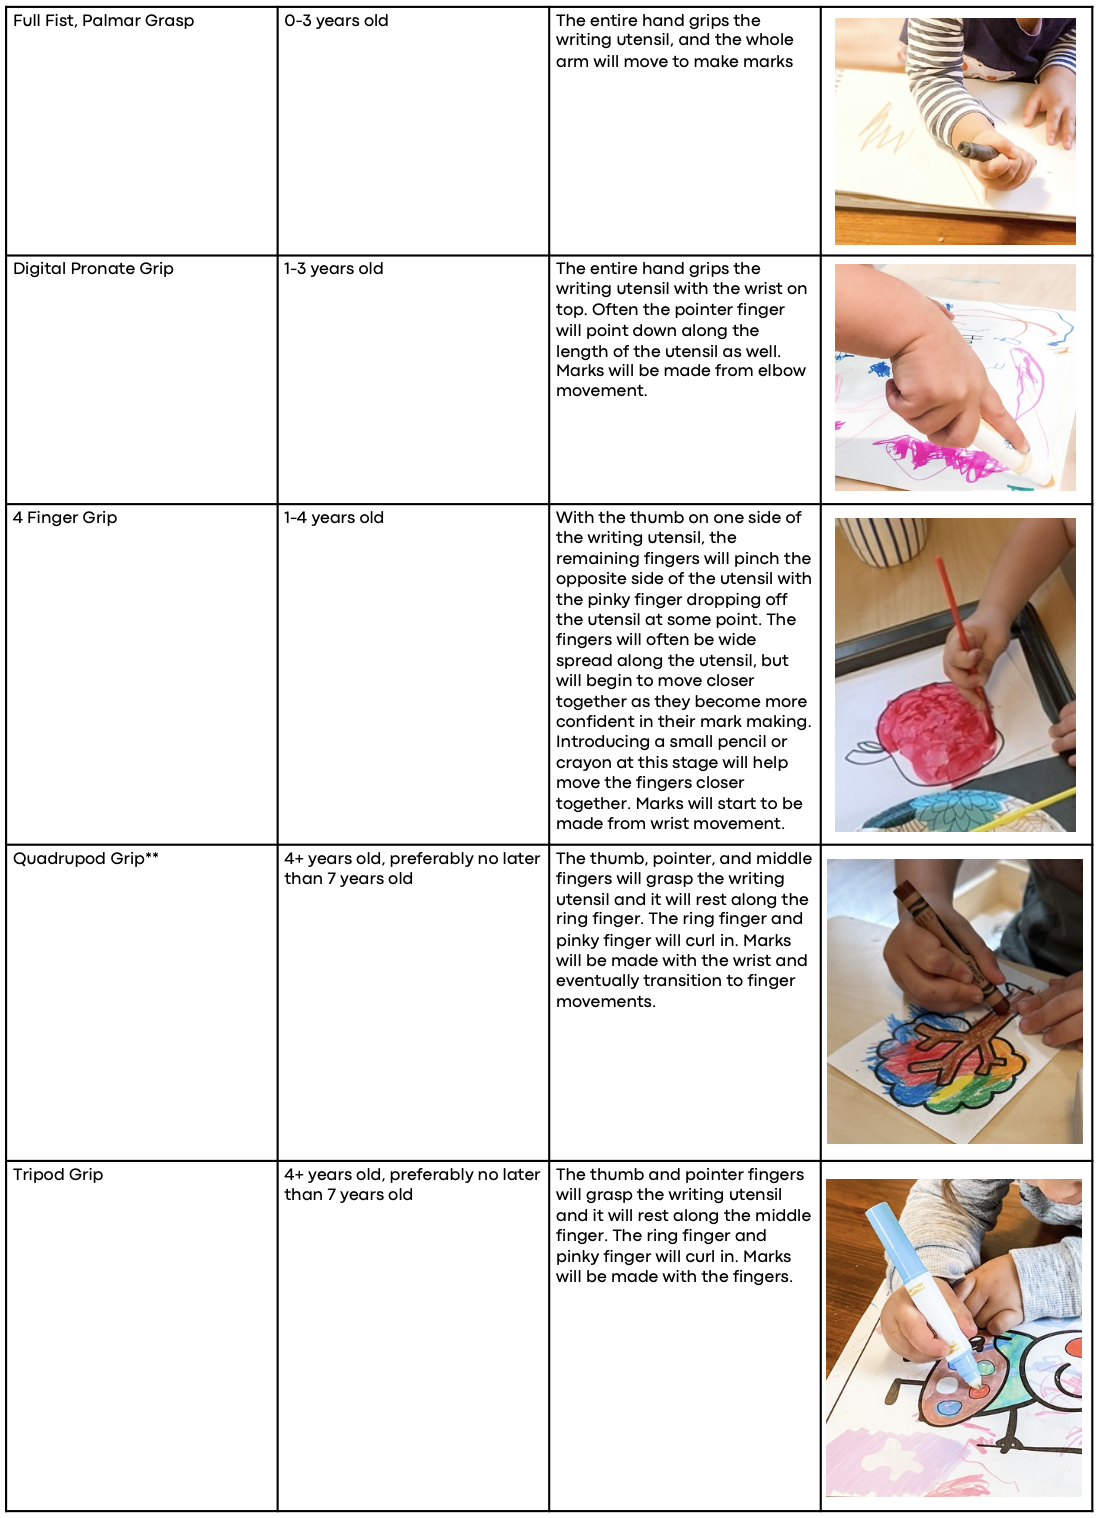
**THIS IS A FUNCTIONAL PENCIL GRIP! If a child ends at this grip and is able to trace, write, draw, etc. fluently and confidently there is no need to try and alter their grip to a tripod grip. This grip is a perfectly acceptable pencil grip that many many people find comfortable and functional into adulthood. If your child’s teacher is trying to change your child’s pencil grip from a quadrupod grip to a tripod grip claiming it is not an appropriate pencil grip, politely disagree and allow your child to continue writing in this way.
As your child develops their pencil grip, please remember: All children develop this skill on their own timeline. They may or may not end with a tripod grip, a quadrupod grip is also an accepted pencil grip for writing fluency. Their pencil grip should be comfortable and effective, it should not overly strain their hand muscles. The best thing you can do for your child or students as their pencil grip develops is to not compare them to one another. Give them the tools to practice, opportunities to practice, and time to practice. Cheer them on and encourage their progress. Remember this process spans up to 7 years. This is not a sprint, it is a marathon!
So now your child is holding a writing utensil, what next? Do we start writing letters? Writing their name? Numbers? What if I told you… none of it! Be on the lookout in 2 weeks for part 2 of our Developmental Writing Deep Dive to learn more!
Disclaimer: If at any time you have concerns about your child's fine motor planning or development, please discuss your concerns with a medical professional such as a pediatrician or occupational therapist. No information or suggestions in this blog post should replace the information provided by a medical professional. All activities and materials recommended in this blog post should be done under the supervision of an adult as some items are small and could be choking hazards.
Looking for more fine motor materials vetted by an early childhood educator? Checkout our Fine Motor Favorites list!